runIDV script. /home/idv/IDV_6.2u2)
cd /home/idv/IDV_6.2u2
runIDV script.
On Unix/Mac:
cat runIDV
On Windows:
type runIDV.bat
You should see a printout that ends like this:
On Unix:
command="java -Xmx${idv_memory}m -Didv.enableStereo=false -jar ${dirname}/idv.jar $*"
and then some code to find the version of java to use.
On Windows:
jre\bin\java -Xmx%idv_memory%m -Didv.enableStereo=false -jar idv.jar %*
The script sets up the environment for the IDV to run. Details
runIDV script. To get
a listing, run the following command:
./runIDV -help
You should see a printout like this:
        -help  (this message)
        -properties  <property file>
        -installplugin  <plugin jar file to install>
        -plugin  <plugin jar file, directory, url for this run>
        -noplugins  (don't load plugins)
        -cleardefault  (Clear the default bundle)
        -nodefault  (Don't read in the default bundle file)
        -default  <.xidv file>
        -bundle  <bundle file or url>
        -oneinstanceport  <port number>
                 (Check if another version of the IDV is running. If so pass command line
                  arguments to it and shutdown)
        -nooneinstance  (Don't do the one instance port)
        -nopref  (Don't read in the user preferences)
        -userpath  <user directory to use>
        -sitepath  <url path to find site resources>
        -nogui  (Don't show the main window gui)
        -data  <data source> (Load the data source)
        -display  <parameter> <display>
        -islinteractive  <scriptfile> (run the isl file in interactive mode);
        -islfile <scriptfile>  (Run the IDV Jython script in batch mode)
        -image  <image file name> (create a jpeg image and then exit)
        -movie  <movie file name> (create a quicktime movie and then exit)
        -imageserver  <port number or .properties file>
                   (run the IDV in image generation server mode. Support http requests on the given port)
        -Dpropertyname=value  (Define the property value)
        -catalog  <url to a chooser catalog>
        -connect  <collaboration hostname to connect to>
        -server  (Should the IDV run in collaboration server mode)
        -port  <Port number collaboration server should listen on>
        -chooser  (show the data chooser on start up)
        -printjnlp  (Print out any embedded bundles from jnlp files)
        -setfiles  <datasource pattern> <semi-colon delimited list of files>
                     (Use the list of files for the bundled datasource)
        -currenttime  <dttm> (Override current time for ISL processing)
        -listresources  (list out the resource types)
        -debug  (Turn on debug print)
        -debugmessages  (Turn on language pack debug)
        -recordmessages  <Language pack file to write missing entries to>
        -trace  (Print out trace messages)
        -traceonly  <trace pattern> (Print out trace messages that match the pattern)
-installplugin argument to load some
workshop specific configuration files from a plugin. (You will
learn more about plugins later in the workshop).
To start the IDV for the workshop the first time,
type (Cut and Paste tip
 )
:
)
:
./runIDV -installplugin https://docs.unidata.ucar.edu/idv/plugins/workshop.jar
While the IDV is starting, you will see the following splash screen:

IDV Help Tips window. An optional
window with tips on using the IDV.
IDV Help Tips window
by clicking the Close button. We'll
look at this in a later exercise.
Dashboard window. Used for
selecting data to analyze and visualize.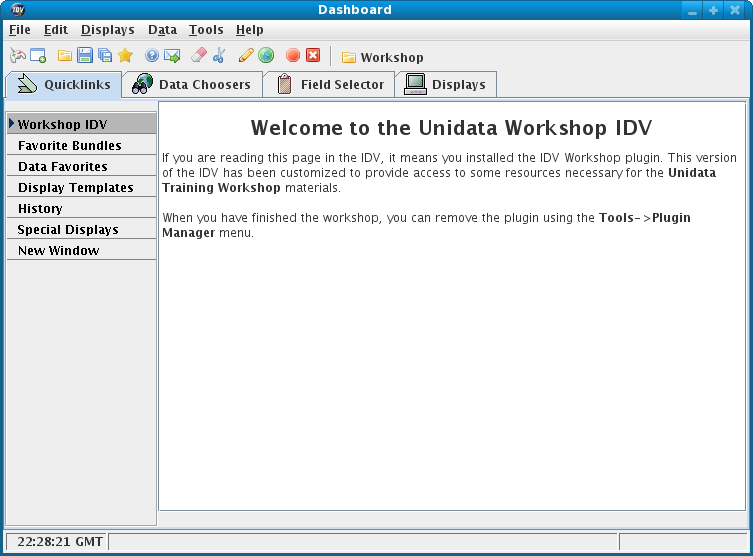
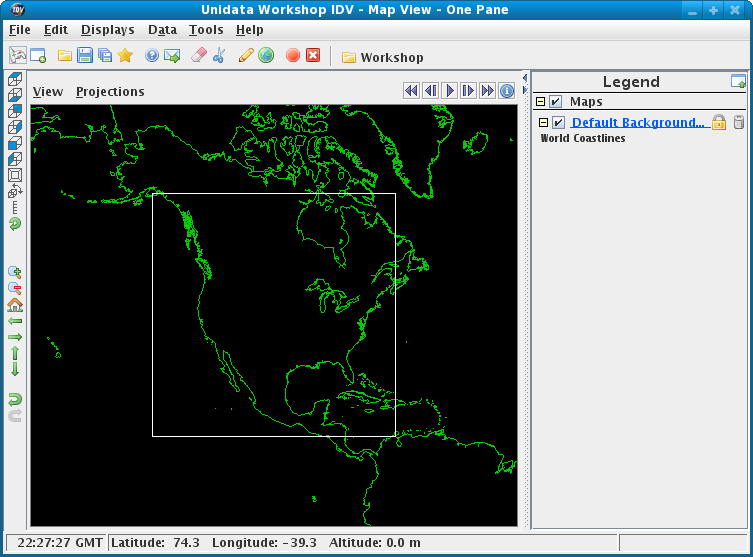
Unidata Workshop IDV window. This
is the main window for displaying data visualizations.